
Christmas decorations are up and out (or as much as I'm going to get to this year) and I thought I'd show you a little of what I did. I love this hat box that doubles as wrapping accessory holder and I have to tell you about my color scheme.
Almost 7 years ago, Ben and I got married just before Christmas. I loved it and wouldn't have done it different looking back. I had already chosen red and gold as my color scheme for the original date we picked (in June) but changed the date to Christmas time and it worked so much better. We had hardly any decorating to do at the church, I had poinsettias in my and my bridesmaid's bouquets, and it was perfect. No matter how much I try, every Christmas decoration I am drawn to will always be red and gold. There's more, but this is the only picture I have so far...

I just love hand quilting! Sometimes it's harder, takes longer, and might not make sense to some people, but it's so relaxing to me. Hubbin is always asking me when I'm hand quilting, "Wouldn't it be faster and easier to do that on your machine?". To answer him yes it might be faster depending on the look I'm going for. Easier, depends on the project. Sometimes if I want to be really accurate and my machine just can't make the sharp turns cleanly, or I have a bunch of starts and stops I will hand quilt it instead.
Hand quilting uses very small needles that are only about an inch long, and I usually use a coated thread. The coating on the thread helps protect it since while quilting it will get much more abuse going through all three layers (top, batting, and backing) over and over again. You can use any thread you like, however if it's not coated, you will need to treat it with either wax or Thread Heaven and use much smaller pieces overall.

I quilt towards myself or to a slight left (but I'm working on sewing in more directions) because I'm right handed and it feels best for me. You can quilt away from yourself, or in any direction. The nice thing about using a hoop is you can move the hoop depending on where you need to stitch so it's more comfortable.
I use two different types of hoops to quilt. In the above picture you can see a resin round hoop. I like this style because it has a locking lip and groove between the two pieces so it holds the quilt better without slipping like some plastics can do. Other round hoops can be found in wood or other materials and it's good to have a variety of sizes. To help with slipping on hoops without a tongue and groove system like mine, there's a new tape out that has grips on it specifically to help keep things where you like it. Other shapes found in these materials are oblong and oval and they also come in different thicknesses.
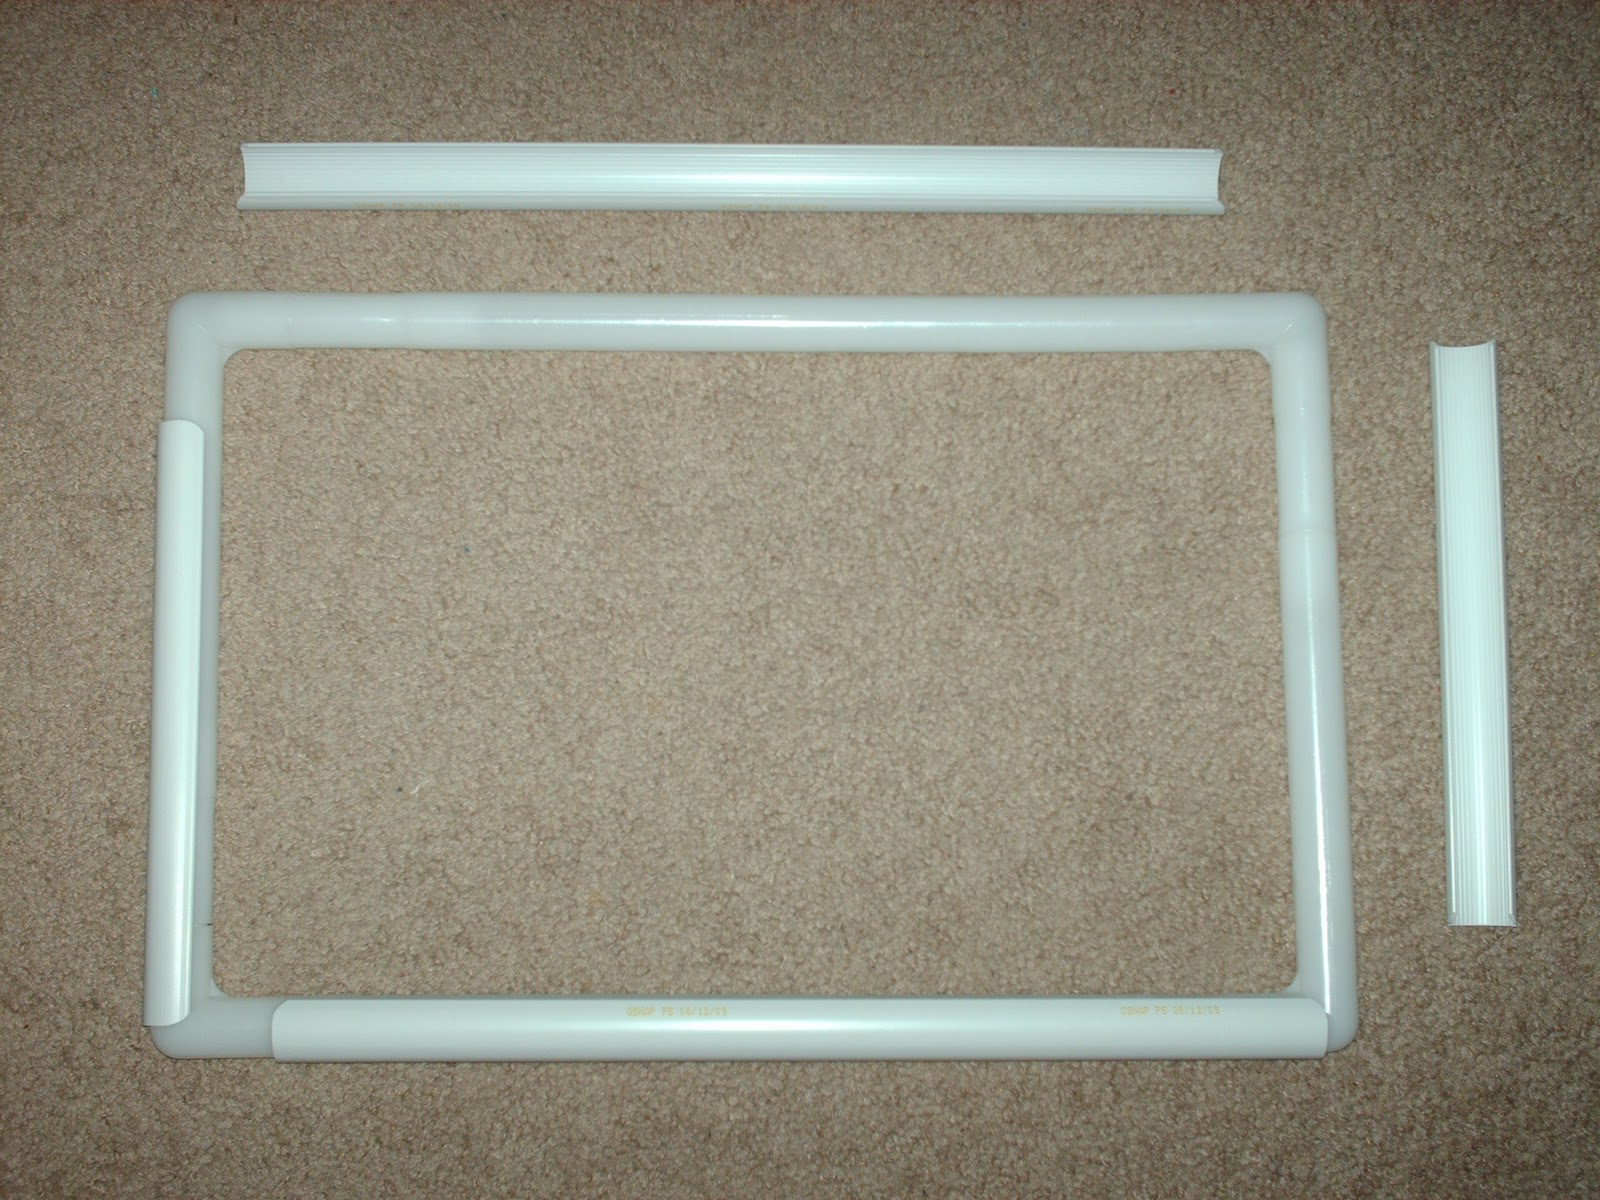
Another style that I just started using recently is a snap frame. This is great for traveling or even embroidery projects as well. There are four parts that make up the rounded frame (like a PVC pipe material) and there are four pieces that snap onto the sides holding your project in place (on the top and side). I also like this for different reasons. One of the most important aspects of hand quilting is to keep your project taught through all the layers, but have enough give while quilting to allow the needle to glide through the quilt. If you have it too tight, your needle will just bounce back at you and you'll be fighting it more than needed. With the way this frame snaps the pieces onto the sides, to change the tension all you have to do is twist the outer piece to either loosen or tighten the layers.
Also it is rectangular so depending on the style of quilting pattern you're using, you can quilt more at one time without having to move the frame. The only thing to watch out with this quilt is with the nature of how the pieces snap together for tension, you are more prone to wrinkles and creases in unwanted areas if you're not careful. But overall, it's a great tool to have.
Another important thing to have is a thimble (or 5)! I prefer rubber thimbles and have a few on hand because or hands change, temperatures change....and with rubber thimbles they're easier to adapt to these changes than a metal one. If you put on your thimble and it's way too tight, throw it in the microwave for a couple seconds and it should loosen up a bit. Otherwise if it's too loose, throw it in the freezer or fridge for a few minutes and it should shrink a tad. You can't do that with metal! And for the right fit, get one that feels just a bit too tight, you'll thank me later. If you get one that fits just perfect now, after a couple hours of quilting your hands will be warmer, it will get warmer and loosen up and might be too loose. But that's also why I recommend getting a few. They will all naturally be different if just slightly.
The quilt above is one I'm working on quilting now, below is From Grammy With Love and it was my first hand quilted "quilt". I found this butterfly border and love the way it turned out. I have since washed this quilt which gives it an extra "crinkly" feel that adds to the 1930's charm of the fabrics. I'm also working on a few other things that I can't show because Christmas is coming and inquiring eyes might be looking...

So to recap, the basics needed for hand quilting are:
* Hand Quilting Needles
* Coated Thread (or thread and wax)
* Thimble (saves your fingers!)
* Quilting Hoop or Frame
* Scissors
There is so much more to it than I can tell you here, but if you get the opportunity, take a class. This is a great technique to learn and it's very cost effective to quilt things on your own. If you have any other questions, please let me know by commenting here or e-mailing me at RubyBlueQuilts at Gmail dot com. Also, sometimes it can add a charm that machine quilting can't give you for period specific quilts. I love it not for just the charm and the savings, but it is so relaxing! This time of year I pop in a movie, sit on the couch, and just quilt away for hours.
Wow -- wonderful and even more important Happy Anniversary -- Enjoy x
ReplyDelete