Showing posts with label Dream Batting. Show all posts

6.17.2015

Machine Quilting: Crazy Thistle Pods

I don't mean crazy as in this quilt is crazy. I mean the quilting in this quilt is crazy! Maryellen sent me this quilt after she worked on it for a long time. Knowing that she put blood, sweat, and tears into this quilt, she wanted the quilting to be in the same ballpark.
 I mean seriously, when you have this much work in all of those points and curves... you want the quilting to be awesome. And crazy. And that's what we did.

Maryellen and I went back and forth for a while trying to decide on a plan. There were definite elements she knew she wanted in the quilting and other areas we had to figure out as we went. All in all, it is stunning, but I'll let the pictures do the talking...
 I only used two different threads for the top - a light green and a variegated blue and green for the darker fabrics. The majority of the quilt was filled with a mixture of pebbles, swirls and a random feather or two.
 The outer border was split between these fun feathers in the lighter fabrics and simple shadow compasses (mimicking the pieced compasses) and wavy lines in the darker fabrics.
 The variegated thread worked so well in the darker fabrics. It had just enough pop and sparkle without being too bold.

 These stars are very similar to a New York Beauty block that you'll find in several of Judy Niemeyer's patterns (this is four of them put together). I quilted this ribbon candy design in a New York Beauty section of this quilt, and I knew it would look so neat as a continuous design in a circle. To contrast the curves in the center and the pebbles in the background, the spikes were kept simple with straight lines.
 The biggest trick with quilts like this that have several complex elements already - keep it all cohesive. You don't want any one area to stand out too much and it all has to work well together.
 I can't get enough of these feathers! I may have to do them again soon! You can probably see a shadow compass here a bit better.
 All in all, this quilt is large and crazy quilted. However, at the end of the day I'm so excited with the result and Maryellen is too. I think her exact word when she got the quilt back was YOWZA!
 I could stare at this quilt all day...
 I love how the texture turned out and everything is quilted just enough...
 I used two different threads on the back of the quilt, but both blend in well enough on this fun fabric.
 I love being able to see the designs and details on the back as well as the front.
Here you can see the thread detail a bit better. The fabric was a very blue-green and it altered the thread colors just enough that my first choices were too bright or dark or something. I ended up using Midnight Harbor and Olive Green and I'm so pleased with how they worked out. In this picture, the blue is on the left and the green is on the right. The straight lines are done, one of each color.

I chose to use the blue with the variegated thread since I was dealing with batiks top and bottom. It limits the range of thread colors I can use (if I'm not using the same thread top and bottom) since batiks are woven much denser and can cause some tension issues if you're not careful. The closer the thread colors are to eachother, the better the end results will be.

Phew, what a quilt! Wouldn't you agree? Thank you, Maryellen!!! I hope some binding fairies came to help and you can enjoy your masterpiece of a quilt.

If you're interested in learning more about my quilting services, please e-mail me at RubyBlueQuilts at gmail dot com, or you can see more information on the Machine Quilting Information page here on the blog.

5.22.2015

Machine Quilting: Cottage Stars

Has this ever happened to you other quilters out there - you look at and stare at a quilt all day long... You come up with a general plan of how you want to quilt it, but you take a picture of the top in case you have an idea later and want to look at the quilt again... Then while looking at the picture, you notice a completely different secondary design you didn't notice before and change your whole plan...

Well, that's what happened to me with this quilt:
 When Bobette brought this quilt in, we already knew that feathers had to be a part of the stars and the background needed to be soft to fit the cottage-y feeling that fabrics gave off. However, when I took my picture of the quilt top to think it over and let a plan develop (because let's be honest, this quilt is massive and I didn't want to pull it out and unfold it everytime I wanted to look at it), I noticed a secondary pattern that created diamonds between the stars and a phantom square block behind each shoo fly.
 When the blocks are this large, I thought about the plan ahead of time and tried to come up with something that would easily be broken up into smaller areas to fit within the usable width of the long arm or ways I could break the stars (because they were the biggest element) in half.

I came up with this framed dahlia design for the secondary diamond pattern. To carry the same idea through the quilt, I used the same motion to quilt the corners of the shoo fly blocks. To fill in the background of the shoo flies, I quilted in some loop-de-loos and some straight lines to work off of the corners of the phantom frames. (I hope this all makes sense, it's hard to label areas when it's all worked out in my brain. Sometimes I don't know if it translates so well. )
 We already had a plan to quilt feathers in every other spike of the stars. To keep the design interesting and not too monotonous, I alternated the design from star to star mixing straight lines with echoed diamonds. There were a variety of fabrics that were used and the mixture of quilting designs helped to balance the quilt with the quilting.
 Sometimes it's inevitable, with lots of seams coming together, there can be bulk. No biggie. I was planning to start the feathers at the center of the star and work outward, but I was able to start just off center in each spike and rotate the feathers. It's important to always keep a design like this going in the same direction each time or else it could look messy. A simple chalk mark for the feather vein did the trick to keep me on task.
 All in all, this was a gorgeous quilt and I was sad when it was over.
 It was so neat to have this unexpected design take the forefront of the plans and then I got to watch it some together piece by piece.
 It was very rewarding to see the quilt finished because of the size, I could only see most of a row at a time when it was on the machine. It was lovely to see the completed quilt and take in the full effect.
A design like this is so much fun for me to quilt because not only does it look awesome on the front, but the back can look amazing too. This quilt could be dual purpose as a whole cloth and a pieced quilt depending on which side you display.

I'm happy to report that Bobette loved this quilt and said she thinks it's her favorite I've done for her so far. (that always makes me happy to hear) Granted, she actually kept this quilt, so that could sway her decision, but I love how the quilting came out and I'd love to work on one again.

I believe this pattern is a tutorial by the Missouri Star Quilt Company called the Big Star. It's interesting because I saw another picture of someone's version of this quilt and I noticed a completely different design because of the way that one was colored. It was darker more fall-type colors and there was a whole new secondary pattern that jumped out at me.

It just goes to prove that a new view and a new idea can be a wonderful thing!

If you are interested in my quilting services, please be sure to check the Machine Quilting Information page or you can always e-mail me with questions at rubybluequilts (at) gmail (dot) com.

2.12.2014

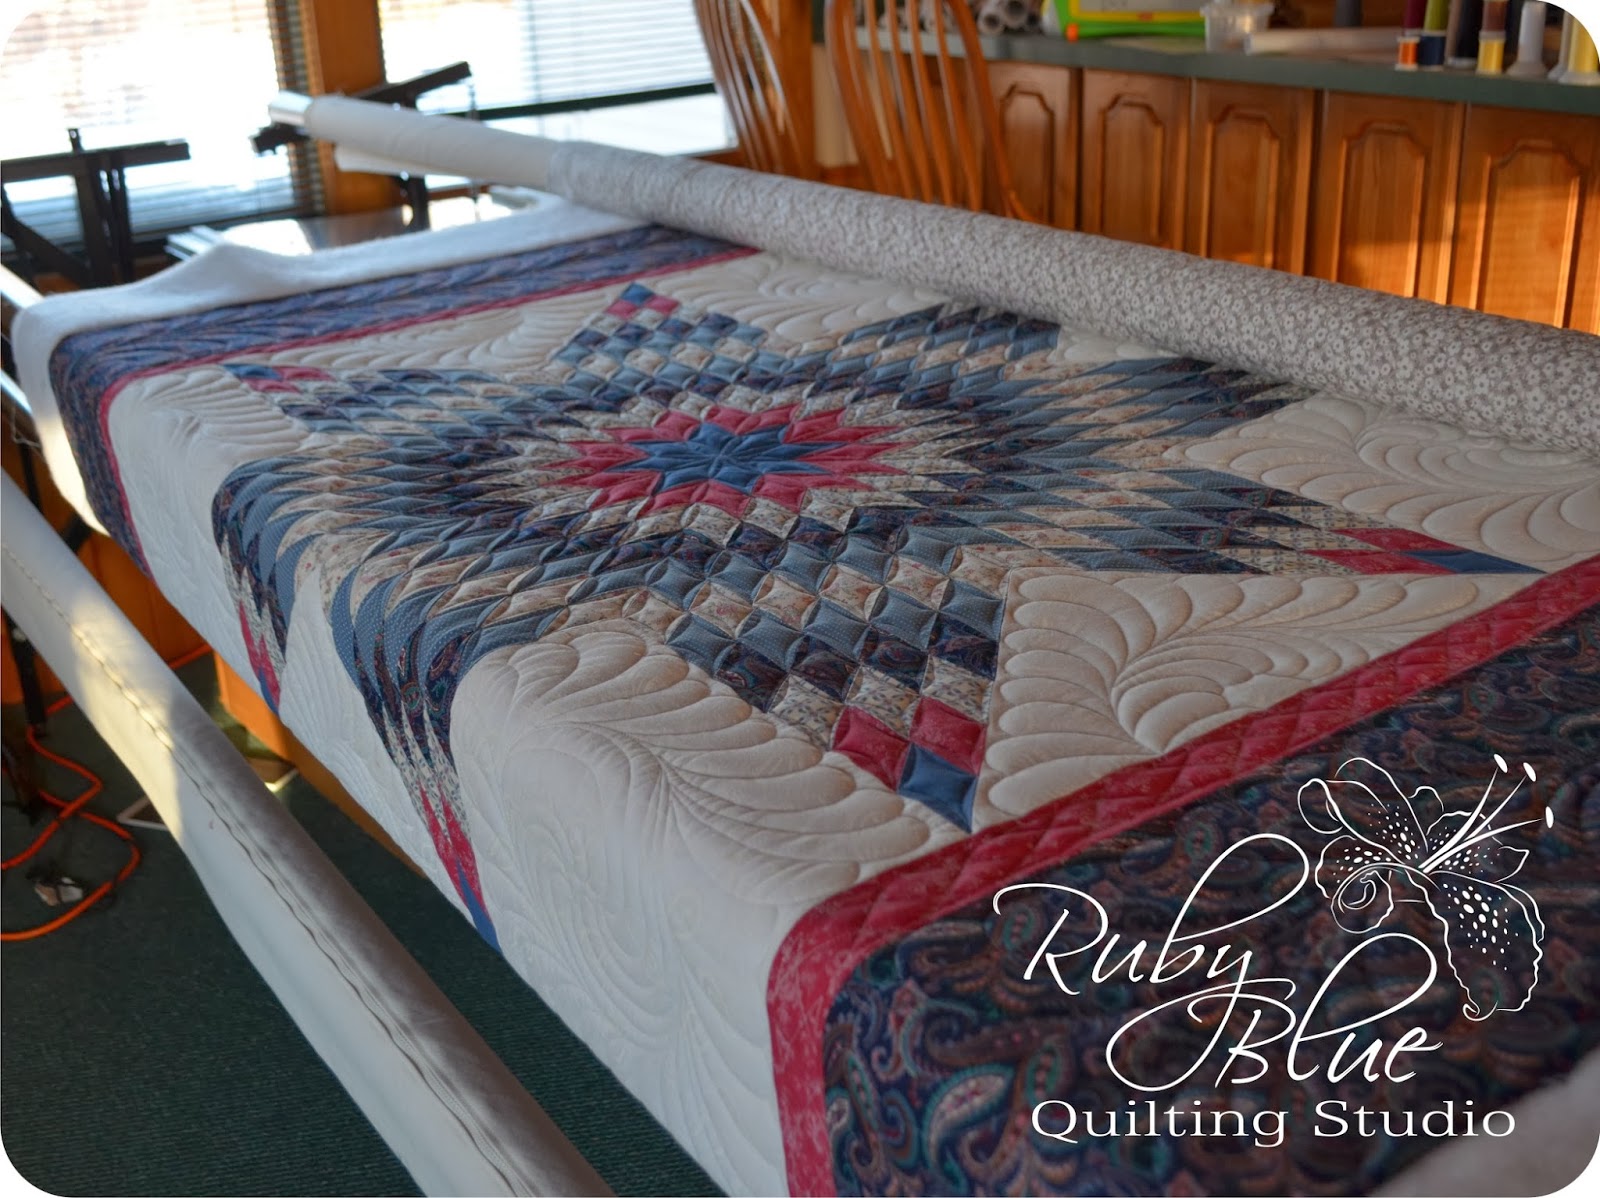
Machine Quilting: Lonestar

Darlene is on a mission to finish up several quilt tops hanging around her house and this was one of them:
 Isn't this quilt amazing?! In person the colors are much brighter. For instance, the red isn't red - it's more of a rosy mauve type color. The blues are much brighter, etc. etc. Alas, I love it!
 Darlene wanted to keep it more traditional with the feathered wreaths and line dancing in the star itself, which is where I offered to try the Dream Puff batting to keep it authentic. Plus, I knew it would make the quilting pop.
 I switched up the threads between the borders, star and background. The background and rosy border both got an off white thread where the star and outer border got a light blue thread. That way the thread didn't take away from the quilt. The last thing you would want on a quilt like this is thread that's in your face loud.
 I love Love LOVE this quilt. And now I want to make one of these too. Just so I can quilt it. And hang it somewhere. It reminds me of my Great Gramma. But this isn't about her or me, so back to the quilt...
 Sorry for the picture overload, but can you blame me?
 I knew how to quilt the star, I knew how to do the feathers. The last area I had was the rosy border. I was done with everything else and I still didn't know what to do.

The challenge was it's small. And it's surrounded by feathers. Usually in small spaces like that a flowy design works well, but another curvy design would have looked like a hot mess. I looked through my Angela Walters book for inspiration. I found one I liked, but I wasn't sure how it would look since I hadn't done it before. So I turned to my Pinterest page... and that moment it didn't want to work and was only showing me two pictures, neither of which helped.

Taking that as a subtle hint that the design I kinda liked was the one to go with, I played on the magna doodle for a minute to get comfy with the design (it let's me draw out the design first on something other than the quilt. A dry erase board could work too, but no mess with the magna doodle) and then I went back to the machine and it was done. And it worked! I love it!
 You can see the design here. It's basically triangles, but it gives the border a look of argyle and it broke up all of the feathers perfectly. I will warn you, it looks weird up close, but you have to look at that design as a whole.
 So there you have it. A very traditional type quilt. I have to say this was quite refreshing in the mix of all of the contemporary crazy shaped quilts I've been working on. I love quilts like this, but I'm a traditionalist at heart.
 Oh, and this post wouldn't be complete without some shots of the back of the quilt!
I heard from Darlene that she loves the quilt and it's also cat approved. Her cat Nermal found it almost instantly when she brought it home and has found himself a new spot.

Thanks, Darlene! Great job!
Related Posts Plugin for WordPress, Blogger...