Judi contacted me about quilting her Glacier Star for her and when she sent me the pictures, I knew it would be fun. I asked her if there was anything she wanted or liked that I've done before and she told me she liked
this one Doris made. I also asked Judi what she was inspired by for this quilt. I had tropical in my brain when I saw all of the vibrant blues and purples, but Judi threw me for a curve when she said Northern Lights.
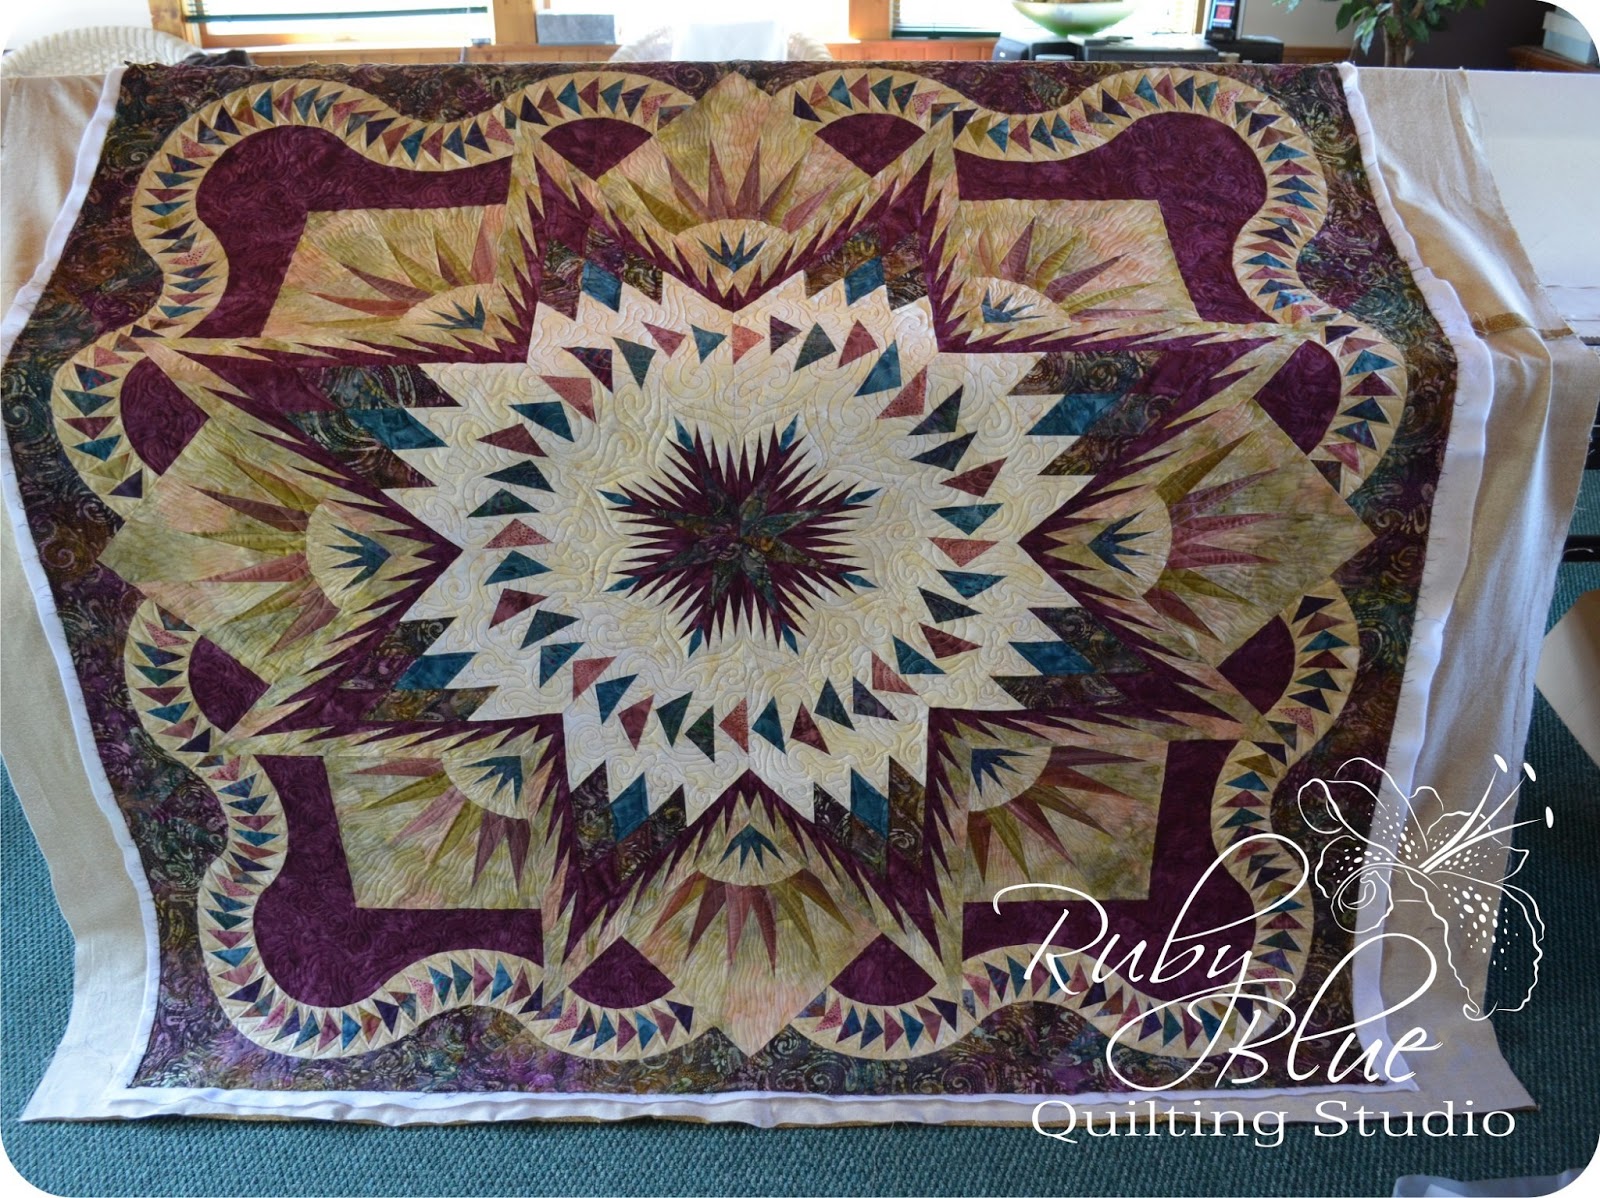
This quilt is so much more vibrant in person and it's just gorgeous. I personally have never seen the Northern Lights so this was a fun little challenge to me. But then again, you can tell I've been brainwashed by the Caribbean when that was my first thought :)
The biggest challenge for me was the high contrast of this quilt. It went from white to black and every shade of blue in between. With that large of a contrast I have to be super careful with the thread choices I make and where to quilt.
I quilted the majority of the quilt in a light blue and white thread. That way the quilt and the quilting gets noticed and not the thread color.
*A common mistake in quilting is that bold thread colors will make the quilting stand out more. It's actually the opposite, you see quilting much more on plain areas when the threads match. Otherwise the threads can be too powerful and that's all you'll see. You'd see thread first, quilting next, and the quilt last. You want the quilting and the quilt to work together, not fight for attention.
I kept most of the quilting simple and organic keeping the Northern Lights reference in the back of my mind.
I did add in some sharp lines here or there because let's be honest, in the places you normally see the Northern Lights, it can be chilly. And icy. And cold. Plus with a design like the Glacier Star, there's so many sharp lines and points that some quilting can bridge the design of the quilt and the softer designs in the quilting.
I switched to a darker thread in the black areas and you can barely see it here. This is actually a batik called raven I think... It's black with subtle hints of blue but reads mostly black. I used a dark blue/purple thread and quilted large chains of circles throughout these weird shapes and used back & forth lines to fill the areas. I wasn't quite sure what to do so I took a chance and I like it!
Overall I tried to keep the quilting soft and I had to add in just a touch of feathers. It just called for it. It was hard trying to mimic the look of Doris's quilt and apply those same items to Judi's because Doris's was done for Florida. Judi's is not.
It all worked out and then I got to see the back. I love how you can see the main star and pick apart all of the areas from the front of the quilt.
In the bottom right ish of this photo you can see the chains of circles that I quilted in the dark areas on the front.
Overall the quilt went together smoothly and it turned out better than I imagined. I was worried it wouldn't have the same vibe Judi was looking for, but I'm glad to report that she loves it!
Thank you, Judi! Your piecing was wonderful and your colors are so cheerful, this was a joy to work on.
If you have a quilt you're interested in having quilted, please either e-mail me at rubybluequilts (at) gmail (dot) com or check out the information on my Machine Quilting Information page. I'm always up for a challenge.
Also, please remember that if you have any quilts you'd like for Christmas gifts, it will be here before you know it so please plan ahead. You can always call and get on the schedule if you're not finished with your project yet, but want to make sure you've got a spot reserved. I have plenty of spaces available at this moment, but it can book up fast!
Have a great day and if you're starting your weekend a bit early, have a great Labor Day!