There is so much inspiration for quilting designs out and about on the Internet. There was one particular pattern set that I kept seeing online, but was anxious to get my hands on... Granted, I could have made one for myself, but it wasn't fitting into the sewing schedule and luckily Jeanne saved the day.
This is the Metro Rings pattern by the wonderful girls at Sew Kind of Wonderful. They have designed a whole line of patterns that feature their Quick Curve Ruler AND they just came out with a QCR Sidekick for long-arm quilting. I really wanted to get the rulers, but I didn't have an excuse to purchase them until Jeanne brought me this quilt.
I'm super glad I did buy the rulers, Jeanne wanted the quilting just like it was on the cover of the pattern. I honestly don't know how I would've accomplished that otherwise.
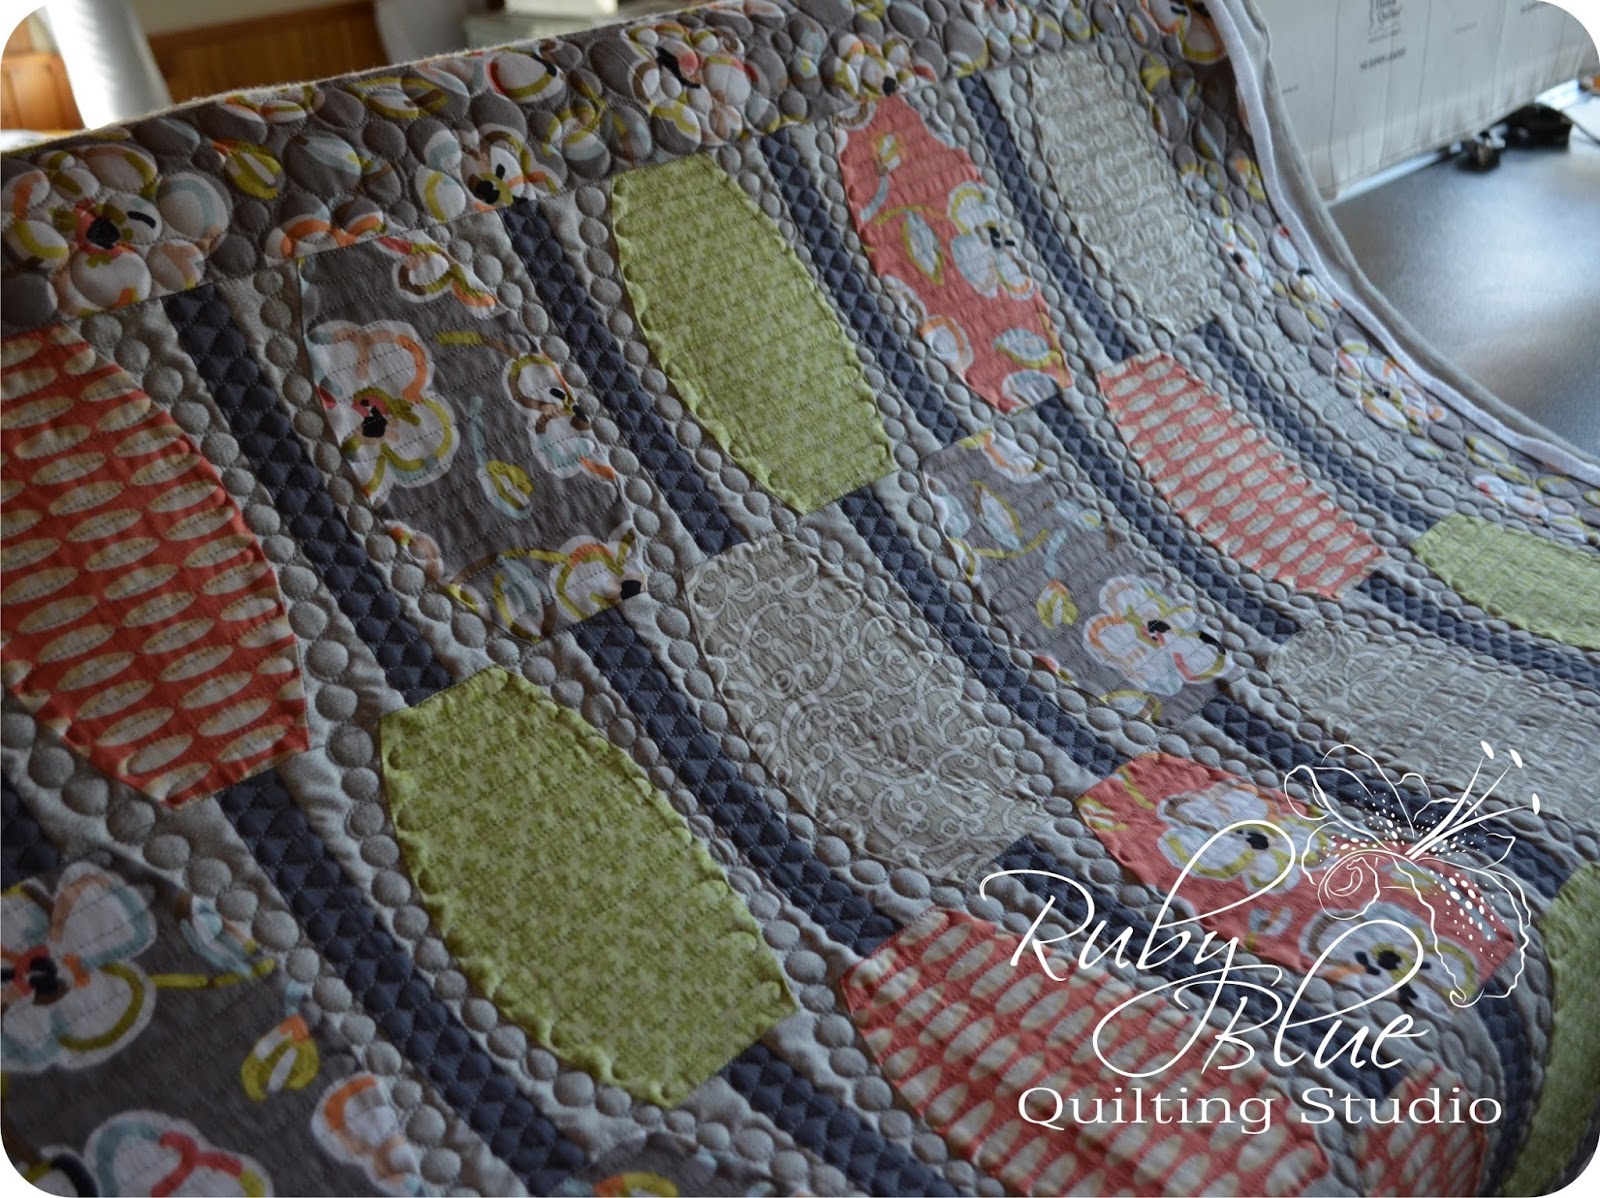
This quilt has a TON of quilting in it. Each of the straight lines are 1/2" apart and the pebbles fill in the gaps in the "melons". It took me awhile to figure out a path on how to complete this design with as little starts and stops as possible, but it was a slow process. Honestly, the picture above was all I got done the first day...
Once I got the hang of the design and got used to the rulers, I gained a bit of speed, but with a quilt like this, accuracy is key and you'll get done when you get done. It took much longer than I anticipated, but I'm so happy with the results, it made it all worth it.
Here are the rulers I used to quilt. Each ruler matches the curve of the design and has 1/4" markings on both the curved and straight edges. I used the larger ruler for most of the straight lines because I could grip it easier, but either ruler works.
After cranking up the radio and quilting along, the quilt was done!
The texture created is just amazing. It's always more pressure to a quilter to recreate a design as someone has done before (especially when it's their own design and you want your work to live up to the high standard they've set) but this quilt was a challenge I was happy to accept. Jeanne asked that I use a loftier batting to emphasize the quilting and the Dream Puff worked so well in this quilt.
A wool batting would get you similar results, but the Dream Puff is washable, it doesn't shrink, and it's just a better alternative if you're planning on using a quilt that may require washing and drying.
I know I've said several times before that with a custom quilting job as intense as this, I'm super excited to see the back of the quilt. Honestly, there was so much going on with the top and I had been staring at this quilt for days I didn't think the back would be as spectacular as the front... I was wrong! It's usually very hard to photograph the texture created with straight lines going in several directions because inevitably one direction is lost without shadows from the lighting. For whatever reason, the lighting this morning when I took these pictures was just diffused enough that you can see most of the lines and really see the pattern well.
I want to thank Jeanne for bringing me this stunner of a quilt and trusting me to "make it look like the pattern cover". Like I said before, that is a tall order, and is sometimes impossible for me when the original was done with a digitized quilting pattern. I'm glad to report Jeanne loved the quilting and I can officially mark this quilt off of my "long-arm quilting bucket list".
Yes, I have a bucket list for long-arming as well as piecing. No, I don't think I'm the only one.
Thank you, Jeanne, for bringing me this quilt to play with!
If you're interested in my quilting services, you can view more information on the "Machine Quilting Information" page or you can e-mail me at RubyBlueQuilts (at) gmail (dot) com too. Currently, my turn around is around a month, but please understand that custom quilting may require more time.